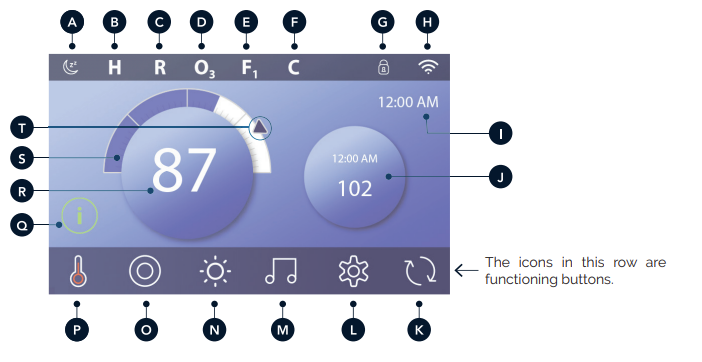
MAIN SCREEN | TOUCH PANEL
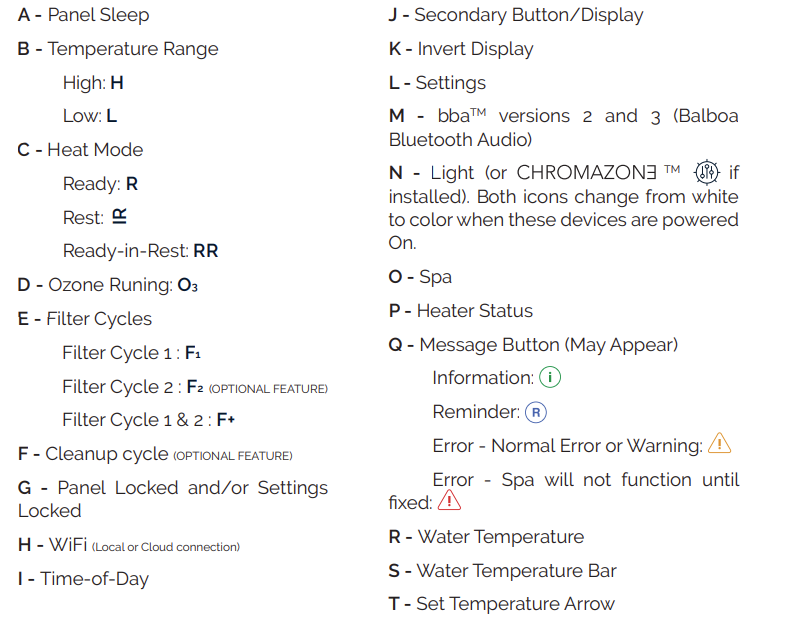
WAKE UP THE PANEL, NAVIGATION & COMMON BUTTONS | TOUCH PANEL
Controlling your spa is easy with the intuitive graphical user interface (GUI). This section describes how to navigate and use the GUI.
Wake Up the Panel
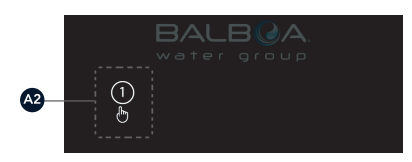
The screen is blank when it is in sleep mode. When you touch the blank screen, one of three screens will appear:
1- The Main screen will appear (A3). The panel is awake.
2- The ![]() icon will appear (A2). Wake up the panel by pressing the
icon will appear (A2). Wake up the panel by pressing the ![]() icon and then the icon.
icon and then the icon.
3- The hand icon will appear. Wake up the panel by pressing the hand icon (A1) and then swiping in the direction of the arrows.
The panel automatically goes into sleep mode when it is not used for a specified duration. The duration can be adjusted.
Buttons
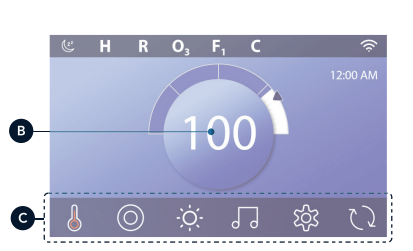
A variety of button styles provide quick access to functions and settings. The large temperature display is a button (B) that controls the Set Temperature. The whole bottom row of the Main screen contains buttons (C).
Mini Player Button (Set Temperature/Time)
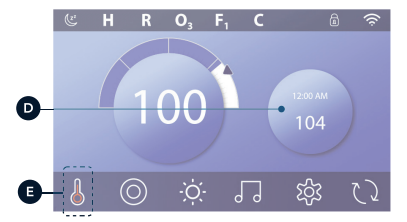
The Mini Player button gives fast access to the Set Temperature and time (D). Show or hide
the Mini Player button by pressing the Heater Status button once (E).
Mini Player Button (Music)
The Mini Player displays music controls (F) if your spa is equipped with bbaTM (Balboa Bluetooth Audio) and it is activated. Hide the Mini Player button by pressing the Heater Status button twice (G). The first press displays the Set Temperature/Time Mini Player button. The second press hides the Mini Player button.
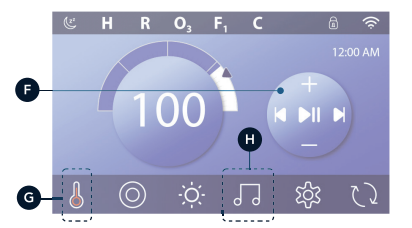
bbaTM button (H)
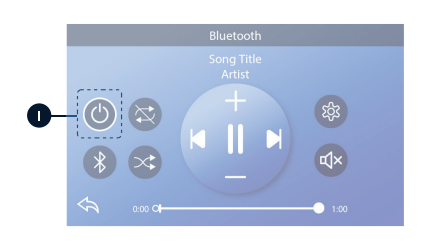
If bbaTM is activated, pressing the bbaTM button (H) once displays the Mini Player (F) with music controls. Pressing the bbaTM button (H) a second time opens the Music screen ( I ) , If bbaTM is activated, a white ring appears around the button, as shown here ( I ).
If bbaTM is not activated, pressing the bbaTM button (H) once opens the Music screen ( I ).
If your spa is equipped with bbaTM, refer to the bbaTM user guide that came with the spa. If a user guide was not included, please contact the spa dealer or spa manufacturer.
Screen Names
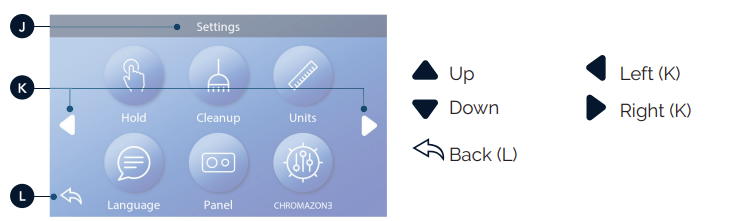
Screen names appear in the top row of the screen. For example, this is the Settings screen (J). Screen names are referenced throughout this user guide.
Navigation
Navigate screens and/or lists with the following buttons:
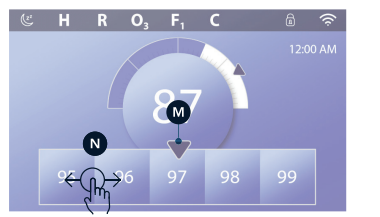
Swiping & Selecting Items in Lists
Swipe a list (N) to find the setting you want. The list will have an arrow (M) that indicates the current setting. If your desired setting appears but is not aligned with the arrow, tap the desired setting to make it align with the arrow. The temperature list will disappear when you tape anywhere outside of it.
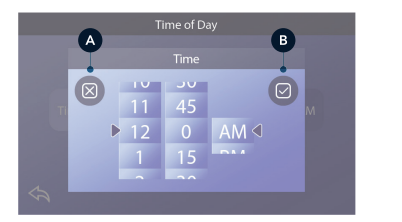
Saving & Cancelling
After you input a new setting, press the Save button (B). After you press Save, the change is complete. If you don’t want to apply a new setting, press the Cancel button (A).
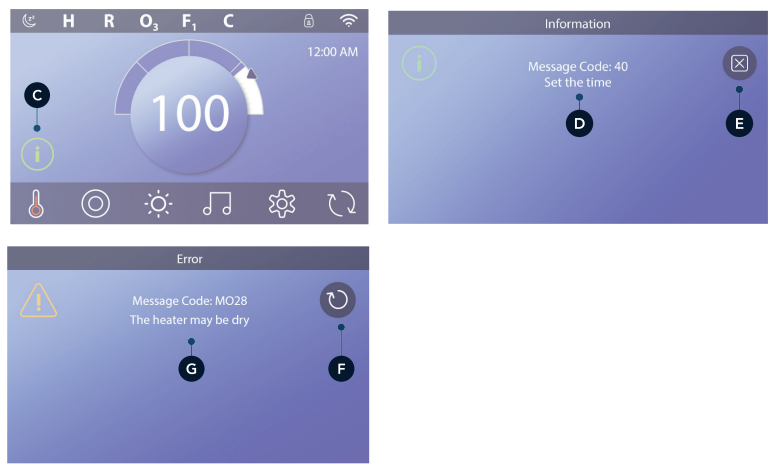
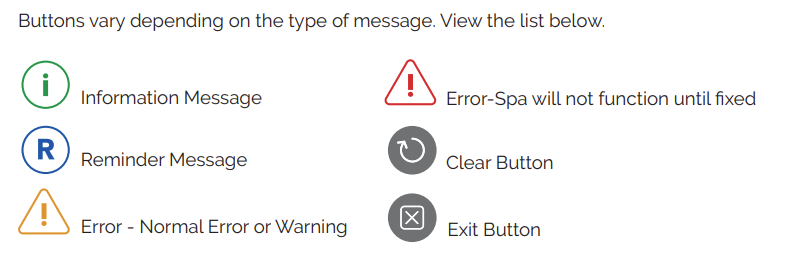
Message Buttons
Message buttons provide reminders to help you keep your spa running smoothly. Message buttons also provide warning information that helps spa technicians with troubleshooting.
When a message button appears (C), press it to view the corresponding message (D) or (G). Press the Exit button (E) to go back to the Main screen or press the Clear button (F) to dismiss the message
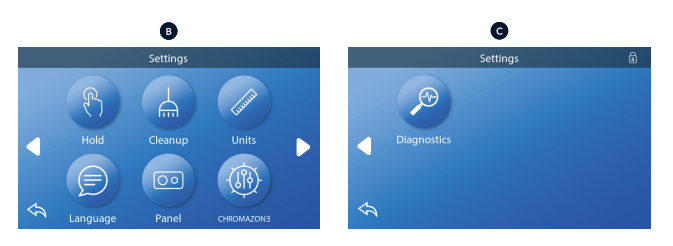
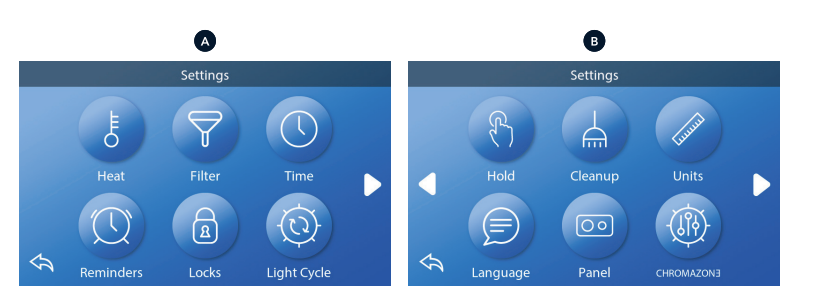
SETTINGS SCREEN | TOUCH PANEL
Fine tune your spa with a wide variety of Seetings.
Starting from the Main screen, press the Settings button ![]() to view the Settings screen (A). Press the navigation arrows or
to view the Settings screen (A). Press the navigation arrows or ![]() swipe to view all of the Settings screens.
swipe to view all of the Settings screens.
HEAT ![]()
Make sure your spa is heated and ready to enjoy with Heat Settings.
FILTER ![]()
Keep your spa water clean and ready to enjoy by setting Filter Cycles.
TIME ![]()
Set the Time to insure scheduled freatures have proper timing.
REMINDERS ![]()
Reminders (A) are helpful spa maintenance messages that display periodically.
LOCKS ![]()
Lock the Panel and/or Setting.
LIGHT CYCLE ![]() (Optional)
(Optional)
If you want the spa lights to turn On and Off at a specific times, use Light Cycle (A).
HOLD ![]()
Hold (B) is used to disable the pumps during service functions like cleaning or replacing the filter. Hold Mode will last for 1 hour unless the mode is exited manually. If spa service will require more than an hour, it may be best to simply shut down power to the spa.
The Hold Icon on the Settings Screen places the spa in Hold Mode and displays the System Hold screen. Touch Back to exit Hold Mode
HOLD ![]() (continued)
(continued)
Drain Mode (Optional)
Some spas have a special feature that allows Pump 1 to be employed when draining the water. When available, this feature is a component of Hold.
CLEANUP ![]()
When a pump or blower is turned on by a button press, a clean-up cycle begins 30 minutes after the pump or blower is turned off or times out. The pump and the ozone generator will run for 30 minutes or more, depending on the system. On some systems, you can change this setting.
UNITS ![]()
Specify Time and Temperature Units (B). The temperature choices are Fahrenheit or
Celsius. The time display choices are 12 hour or 24 hour.
LANGUAGE ![]()
Select from a variety of languages.
PANEL ![]()
You can change two options on the Panel screen:
1 – Set how long it takes the panel to go to sleep after the last activity. Short times are recommended because it decreases the chance of water activating buttons.
2 – Set whether or not you need to do an extra action to wake the panel (see page 6). The purpose of the extra action to wake the panel is to make it very unlikely that water can wake the panel.
CHROMAZONƎ TM ![]() (continued)
(continued)
If your spa is equipped with CHROMAZONƎ TM, refer to the CHROMAZONƎ TM user guide that came with the pa. If a user guide was not included, please contact he spa dealer or manufacturer.
DIAGNOSTICS ![]()
Spa technicians can find useful information and features in Diagnostics (C).